Windows Terminal的配置

Last updated on August 22, 2023 pm

一篇旧文了,搬运一下。
新版Windows Terminal的配置有很大变动,请以最新版为准。
此文所属方法如有任何问题请不要找我——我已经换到Linux半年了。

Windows Terminal的配置

Windows Terminal是微软官方开源发布的Shell环境集成Terminal,自发布以来就备受开发者的喜爱,Windows Terminal不仅开源免费,还拥有现代化的界面、完整的字体字符渲染机制(包括Emoji)、GPU加速和Fluent设计风格,让它成为了轻度Shell工作的不二选择,力压一众第三方终端以及 Windows 自带的默认终端。Windows Terminal与 WSL 一起,让不少先前非Linux不用的开发者朋友们向Windows倾斜。它和VSCode与PowerToys一起,成为了微软新开源三把梭。
其默认的界面已经十分美观了,但我们还可以让它变得外观更好看、功能更高级。
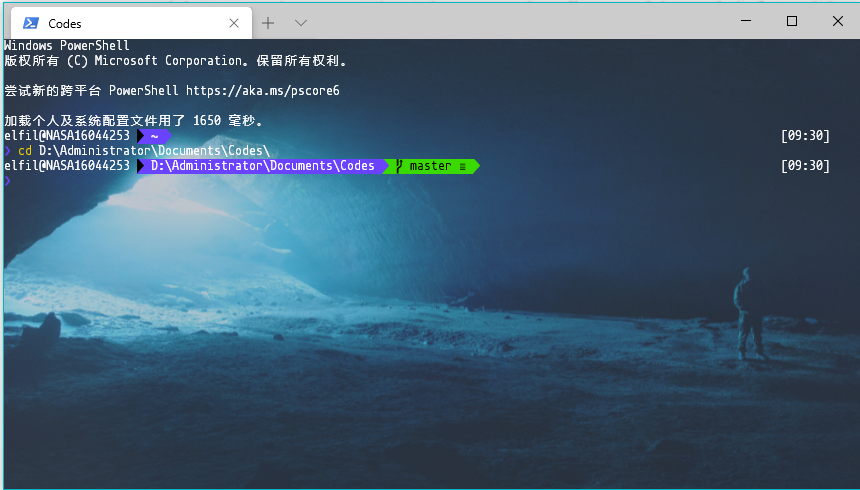
安装了oh-my-posh主题的Powershell+自定义过背景、字体、配色的WT

配置详解

Windows Terminal的配置文件一脉相承VSCode的风格,由Json文件编写。其主要包括以下部分:

  • 全局设定global:这部分配置了默认窗口的大小,默认环境,快捷键设定等;
  • 环境设定profile:这部分对WT可用的环境及其各自的个性化设定进行了配置;
  • 色彩方案scheme:这部分定义了各环境可调用的色彩方案。

global

1
2
3
4
5
6
7
8
9
10
11
12
13
14
15
16
17
18
19
20
21
22
23
24
25
26
27
28
29
30
"globals" :
{
/// 总是显示标签页,如关闭在只有1个环境打开时标签页不会显示
"alwaysShowTabs" : true,
/// 默认环境,配置打开时的默认环境,用该项的GUID作为识别
"defaultProfile" : "{61c54bbd-c2c6-5271-96e7-009a87ff44bf}",
/// 初始行数与列数
"initialCols" : 120,
"initialRows" : 30,
/// 快捷键设置
"keybindings" :
[
{
"command" : "closePane",
"keys" :
[
"ctrl+shift+w"
]
}
……
}
],
/// 明暗主题设定
"requestedTheme" : "system",
/// 设置是否展示标题栏,false为展示(标题栏与标签页分开)
"showTabsInTitlebar" : true,
/// 设置系统读取的标题,true为当前环境标题,false为“Windows Terminal”
"showTerminalTitleInTitlebar" : true,
/// 读取分隔符,\u2502 为“|”符号
"wordDelimiters" : " ./\\()\"'-:,.;<>~!@#$%^&*|+=[]{}~?\u2502"

profile

1
2
3
4
5
6
7
8
9
10
11
12
13
14
15
16
17
18
19
20
21
22
23
24
25
26
27
28
29
30
31
32
33
34
35
36
37
38
39
40
41
42
43
"profiles" :
{
/// Fluent Design Acrylic效果透明度
"acrylicOpacity" : 0.5,
/// 背景色
"background" : "#012456",
/// 退出时关闭
"closeOnExit" : true,
/// 色彩配置
"colorScheme" : "shades-of-purple",
/// 调用的Shell
"commandline" : "powershell.exe",
/// 光标颜色
"cursorColor" : "#FFFFFF",
/// 光标形状
"cursorShape" : "bar",
/// 字体
"fontFace" : "mononoki",
/// 字体大小
"fontSize" : 10,
/// 该环境的GUID编号
"guid" : "{61c54bbd-c2c6-5271-96e7-009a87ff44bf}",
/// 历史记录条数
"historySize" : 9001,
/// 图标
"icon" : "ms-appx:///ProfileIcons/{61c54bbd-c2c6-5271-96e7-009a87ff44bf}.png",
/// 环境名
"name" : "Windows PowerShell",
/// 背景图片
"backgroundImage": "ms-appdata:///roaming/1.jpg",
/// 背景展示模式
"backgroundImageStretchMode": "uniformToFill",
/// 背景透明度
"backgroundImageOpacity": 0.6,
/// Terminal与Shell的边界宽度
"padding" : "0, 0, 0, 0",
/// 自动滚动到输入行
"snapOnInput" : true,
/// 起始工作目录
"startingDirectory" : "%USERPROFILE%",
/// 是否启用Acrylic效果
"useAcrylic" : true
}

scheme

1
2
3
4
5
6
7
8
9
10
11
12
13
14
15
16
17
18
19
20
21
22
23
24
25
26
"schemes" :
{
/// 色彩配置
"name" : "Campbell",
/// 前/背景色
"foreground" : "#CCCCCC",
"background" : "#0C0C0C",
/// 亮色定义
"brightBlack" : "#767676",
"brightBlue" : "#3B78FF",
"brightCyan" : "#61D6D6",
"brightGreen" : "#16C60C",
"brightPurple" : "#B4009E",
"brightRed" : "#E74856",
"brightWhite" : "#F2F2F2",
"brightYellow" : "#F9F1A5",
/// 基本色定义
"cyan" : "#3A96DD",
"green" : "#13A10E",
"purple" : "#881798",
"red" : "#C50F1F",
"white" : "#CCCCCC",
"yellow" : "#C19C00"
"black" : "#0C0C0C",
"blue" : "#0037DA"
},

自定义

给Powershell换个主题

默认的Powershell长这个样子:
Powershell

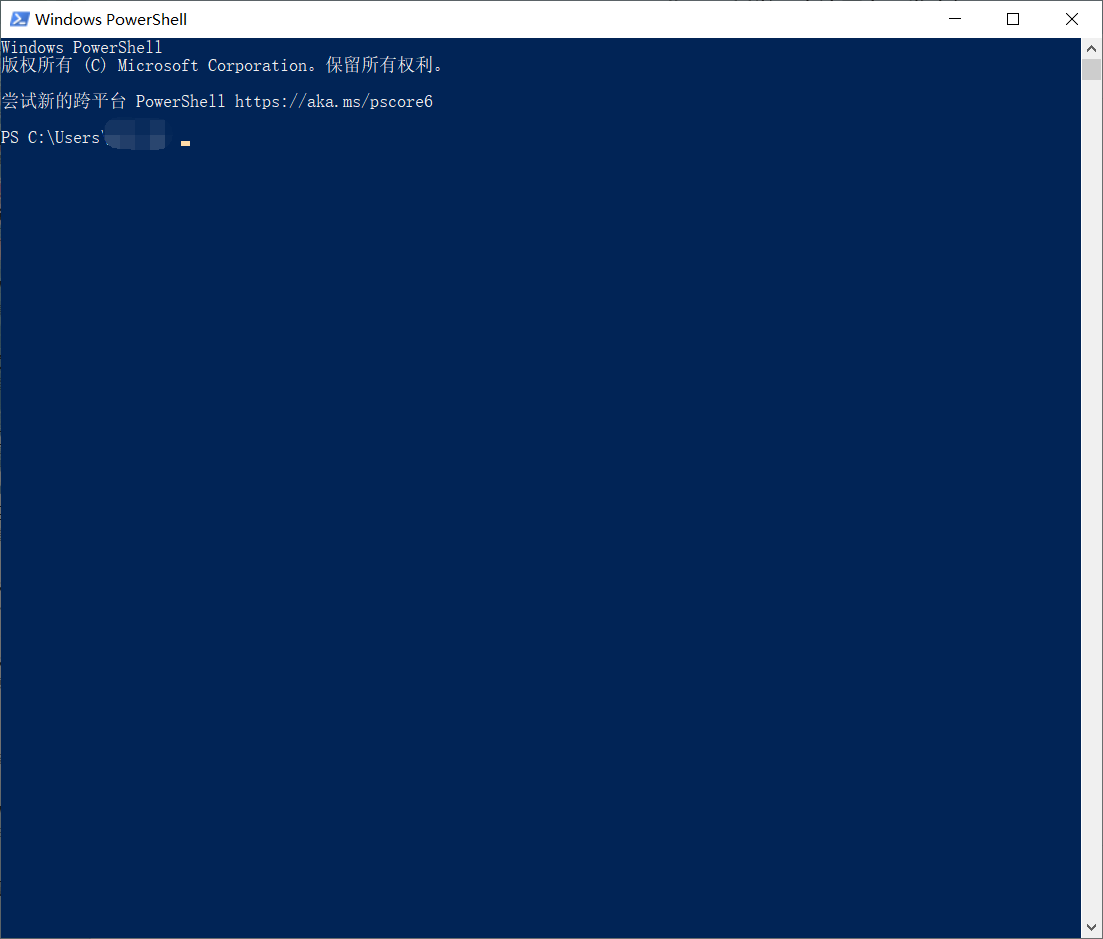
暗蓝色背景,白色宋体字体,很标准的上世纪设计。能用,但很丑。
而经过简单设置后,你的Powershell就可以变成这样:
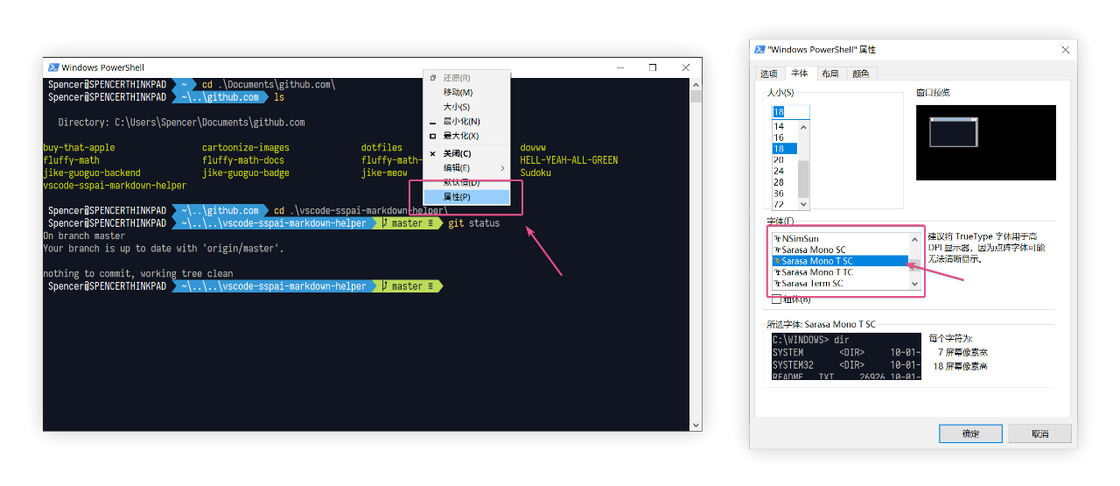
更纱黑体+主题,图源:https://sspai.com/post/52868

更换字体

由于Powershell的限制,只有TrueType字体才能被加载,而该字体还要满足Powerline的很多特殊字符。考虑到我们还有CJK字符的要求,目前最好的方案就是更纱黑体(Sarasa Gothic)
在其GitHub Release页面下载并执行安装后,打开Powershell,右键标题栏,选择属性;
ps字体设置1
在“字体”选项卡中选择合适的字型和字号。
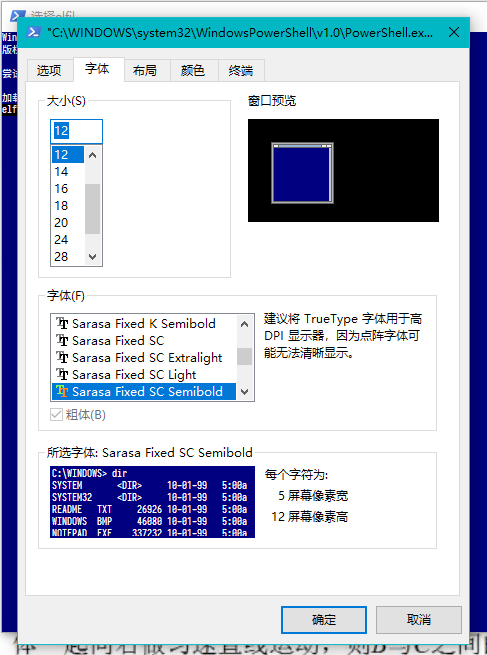
ps字体配置2

安装主题

Powershell常用的主题引擎为oh-my-posh,你可以通过在Powershell中执行以下指令来安装:

1
2
Install-Module posh-git -Scope CurrentUser
Install-Module oh-my-posh -Scope CurrentUser

安装成功没有提示,如出现警告请全部允许。
安装完毕后,使用以下指令在当前ps进程中启用默认主题:

1
2
3
Import-Module posh-git
Import-Module oh-my-posh
Set-Theme Agnoster

如出现无法执行脚本错误,请运行如下指令:

1
Set-ExecutionPolicy RemoteSigned

来允许远程已签名脚本运行。
如要每次开启都自动应用主题,执行如下操作:

  1. 执行指令if (!(Test-Path -Path $PROFILE )) { New-Item -Type File -Path $PROFILE -Force }来创建用户配置文件;
  2. 执行notepad $PROFILE来用记事本打开配置文件
  3. 在配置文件末尾添加如下行:
1
2
3
Import-Module posh-git
Import-Module oh-my-posh
Set-Theme Agnoster

就可以在每次开启时自动应用主题了。

WT的自定义

新建/更改环境配置

大部分情况下,WT会自动检测系统上已有的Shell并自动创建环境配置,但有些时候它不会检测(如Git Bash)。这时就需要我们手动创建环境配置了。
方法:
复制以下Json模板并拷贝到设置文件中:

1
2
3
4
5
6
7
8
9
10
11
12
13
14
15
16
17
18
19
20
21
22
23
24
25
26
27
28
29
30
31
32
33
34
35
36
37
38
39
40
41
42
{
/// Fluent Design Acrylic效果透明度
"acrylicOpacity" : 0.8,
/// 背景色
"background" : "#012456",
/// 退出时关闭
"closeOnExit" : true,
/// 色彩配置
"colorScheme" : "<Color Scheme>",
/// 调用的Shell
"commandline" : "<Shell Path>",
/// 光标颜色
"cursorColor" : "#FFFFFF",
/// 光标形状
"cursorShape" : "bar",
/// 字体
"fontFace" : "<Font Name>",
/// 字体大小
"fontSize" : 10,
/// 该环境的GUID编号
"guid" : "<guid>",
/// 历史记录条数
"historySize" : 9001,
/// 图标
"icon" : "<Icon Path>",
/// 环境名
"name" : "<Environment name>",
/// 背景图片
"backgroundImage": "<Image Path>",
/// 背景展示模式
"backgroundImageStretchMode": "uniformToFill",
/// 背景透明度
"backgroundImageOpacity": 0.6,
/// Terminal与Shell的边界宽度
"padding" : "0, 0, 0, 0",
/// 自动滚动到输入行
"snapOnInput" : true,
/// 起始工作目录
"startingDirectory" : "%USERPROFILE%",
/// 是否启用Acrylic效果
"useAcrylic" : true
}

你需要更改的是所有<这样的内容>

  • <Color Scheme> 改为下文色彩配置中的”name”键值
  • <Shell Path> 改为你的Shell路径。如在环境变量中可直接填exe名。在exe名后添加指令可在启动时自动执行。
  • <Font Name> 改为你想要的字体名称。可在C:\Windows\Fonts\查看。
  • <guid> 改为该配置的GUID。可以在Powershell中用New-GUID指令生成。
  • <Icon Path> 改为该配置的图标路径。
  • <Environment name> 改为该环境的名称。
  • <Image Path> 改为该环境的背景路径。此键值可与下两个一并删除以保留纯色背景。

几个常见的Shell的路径和图标路径:

Shell 路径 图标
Python IDLE python.exe(安装时配置了环境变量) 安装目录/Lib/test/imghdrdata/python.png
Git Bash 安装目录/bin/bash.exe –cd-to-home 安装目录/mingw64/share/git/git-for-windows.ico

你也可以在用户目录/AppData/Local/Packages/Microsoft.WindowsTerminal_xxxx\RoamingState下存储背景/图标并用ms-appdata:///roaming/<文件名>的方式调用。

添加色彩配置

iTerm2为许多Terminal提供了配色方案,WT也不例外。在该仓库中打开windowsterminal文件夹即可看到Json格式的色彩配置。你可以在iTerm2上预览效果后在仓库中拷贝对应Json色彩配置并粘贴入配置文件,在前面环境配置中调用即可。

总结

Windows Terminal绝对是Windows上第一个兼顾速度、界面与可定制性的整合终端。作为微软开源战略下的全新创举之一,它代表了微软未来的对开发者业务方向。Windows Terminal 的出现可以说是直接拯救了多年来糟糕的Windows命令行体验,让 Windows在命令行环境下的操作感受能够与类Unix终端相比。相信,在接下来的版本迭代中,Windows Terminal 会随着设置 UI 界面化、插件系统的加入……而越来越强大。希望这篇文章能够让你重新体验到 Windows 命令行环境的强大,提升在 Windows 上的工作、开发效率。感谢阅读。


Windows Terminal的配置
http://elfile4138.moe/2021/08/Windows-Terminal的配置/
Author
Matrew File
Posted on
August 24, 2021
Updated on
August 22, 2023
Licensed under